Dialog Script
To serve in chat, it's often that we need to ask a series of questions and wait for the answers. In this lesson, you'll learn how to program such conversation flows in a chat.
Time to accomplish: 20 minutes
Make a Conversation
After recognizing the adding todo intent, the bot should ask for the new todo name. To do this, we have to handle the prompt and wait flow in our codes.
In Machinat, it can be done by a Dialog Script.
Build a Script
Let's add our first script for adding a todo.
Create src/scenes/AddingTodo.tsx file with the following content:
import Machinat from '@machinat/core';
import { build } from '@machinat/script';
import * as $ from '@machinat/script/keywords';

export default build(
  {
    name: 'AddingTodo',
  },
  <$.BLOCK>
    {() => <p>Please enter new todo name:</p>}
  </$.BLOCK>
);
Here we build a script for the adding todo conversation.
The script body is a special JSX block to describe the flow.
Script Content
In the script body, the function {() => <p>...</p>} is a content node.
The function will be called when it's met in the flow,
and the returned messages will be sent in the chat.
Register Script
The newly created script needs to be registered first.
Edit src/scenes/index.tsx and export AddingTodo like this:
export { default as AddingTodo } from './AddingTodo';
Use Script
Now we can use the new AddingTodo script in the handleChat handler:
- Messenger
- Telegram
- LINE
import AddingTodo from '../scenes/AddingTodo';
// ...
const handleChat = makeContainer({
  deps: [useIntent, useUserProfile, TodoController],
})(
  (getIntent, getUserProfile, todoController) =>
  async (
    ctx: ChatEventContext & { event: { category: 'message' | 'postback' } }
  ) => {
      const { event, reply } = ctx;
      const intent = await getIntent(event);

      if (intent.type === 'add') {
        return reply(<AddingTodo.Start />);
      }
      //...
import AddingTodo from '../scenes/AddingTodo';
// ...
const handleChat = makeContainer({
  deps: [useIntent, useUserProfile, TodoController],
})(
  (getIntent, getUserProfile, todoController) =>
  async (
    ctx: ChatEventContext & { event: { category: 'message' | 'postback' } }
  ) => {
      const { event, reply } = ctx;
      const intent = await getIntent(event);
      if (!event.channel) {
        return;
      }

      if (intent.type === 'add') {
        return reply(<AddingTodo.Start />);
      }
      //...
import AddingTodo from '../scenes/AddingTodo';
// ...
const handleChat = makeContainer({
  deps: [useIntent, useUserProfile, TodoController],
})(
  (getIntent, getUserProfile, todoController) =>
  async (
    ctx: ChatEventContext & { event: { category: 'message' | 'postback' } }
  ) => {
      const { event, reply } = ctx;
      const intent = await getIntent(event);

      if (intent.type === 'add') {
        return reply(<AddingTodo.Start />);
      }
      //...
You should see the content in the script is replied like this:
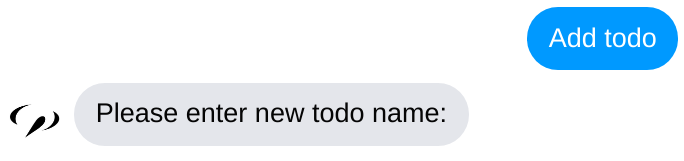
When we reply with AddingTodo.Start, it runs the AddingTodo script on the chat.
After that, the script processor will take over the chat until the running script is finished.
PROMPT For an Answer
Currently, the AddingTodo script immediately ends.
Let's add a PROMPT to stop the script and wait for the answer.
Add the these codes in the script:
import Machinat from '@machinat/core';
import { build } from '@machinat/script';
import * as $ from '@machinat/script/keywords';

type AddingTodoVars = {
  todoName: string;
};

export default build<AddingTodoVars>(
  {
    name: 'AddingTodo',
    initVars: () => ({ todoName: '' }),
  },
  <$.BLOCK>
    {() => <p>Please enter new todo name:</p>}

    <$.PROMPT<AddingTodoVars>
      key="ask-todo"
      set={({ vars }, { event }) => ({
        ...vars,
        todoName: event.type === 'text' ? event.text : '',
      })}
    />
  </$.BLOCK>
);
The PROMPT keyword stops the execution of the script.
When the user answers, the script will start executing again from the PROMPT point.
Script Vars
vars is a special state that exists while the script is running.
It's initiated by the initVars function when the script starts.
Here we store the user's answer at vars.todoName.
The set prop of PROMPT is called when the user answers.
It receives two args:
- an environment object that contains current
vars - event context of the answered message
Then we return the new vars value which sets the todoName for later use.
Execute EFFECT
Now we have the todoName answered by the user,
the next thing is to save it in the state.
We can use the EFFECT keyword to do that:
import Machinat, { makeContainer } from '@machinat/core';
import { build } from '@machinat/script';
import * as $ from '@machinat/script/keywords';
import TodoController from '../services/TodoController';

type AddingTodoVars = {
  todoName: string;
  todosCount: number;
};

export default build<AddingTodoVars>(
  {
    name: 'AddingTodo',
    initVars: () => ({ todoName: '', todosCount: 0 }),
  },
  <$.BLOCK>
    {() => <p>Please enter new todo name:</p>}

    <$.PROMPT<AddingTodoVars>
      key="ask-todo"
      set={({ vars }, { event }) => ({
        ...vars,
        todoName: event.type === 'text' ? event.text : '',
      })}
    />

    <$.EFFECT<AddingTodoVars>
      set={makeContainer({ deps: [TodoController] })(
        (todoController) =>
          async ({ vars, channel }) => {
            const { data } = await todoController.addTodo(
              channel,
              vars.todoName
            );
            return { ...vars, todosCount: data.todos.length };
          }
      )}
    />
  </$.BLOCK>
);
The EFFECT keyword can be used to execute a side effect and update the vars.
Here we save the new todo and set vars.todosCount for later use.
Note that we use a service container to require TodoController.
All the functional props on the keywords can accept a container.
Content With vars
We can also use vars to generate content.
Add the message to show the adding result like this:
import WithMenu from '../components/WithMenu';
// ...

    {({ vars: { todoName, todosCount } }) => (
      <WithMenu todoCount={todosCount}>
        Todo "<b>{todoName}</b>" is added!
      </WithMenu>
    )}
  </$.BLOCK>
);
Now a todo can be added like this:
Flow Control
Now it could be a problem if a non-text message is received.
We can use WHILE keyword to verify the input:
// ...
  <$.BLOCK>
    <$.WHILE<AddingTodoVars>
      condition={({ vars }) => vars.todoName === ''}
    >
      {() => <p>Please enter new todo name:</p>}

      <$.PROMPT<AddingTodoVars>
        key="ask-todo"
        set={({ vars }, { event }) => ({
          ...vars,
          todoName: event.type === 'text' ? event.text : '',
        })}
      />
    </$.WHILE>
//...
WHILE works just like the while keyword in programming languages.
The inner block would keep looping when the condition is met.
The PROMPT is wrapped by the WHILE block,
so our bot would keep asking till the answer is ok.
The result looks like:
Despite WHILE, there are other flow control keywords like IF and RETURN.
You can easily control the dialog like coding.
CALL a Script
Like in programming language,
we can CALL a script in another one to reuse the dialog flows.
Let's try calling AddingTodo in a new script.
Create src/scenes/AskingFirstTodo.tsx file with the following content:
import Machinat, { makeContainer } from '@machinat/core';
import { build } from '@machinat/script';
import * as $ from '@machinat/script/keywords';
import AddingTodo from './AddingTodo';
import useIntent from '../services/useIntent';

type AskingFirstTodoVars = {
  ok: boolean;
};

export default build<AskingFirstTodoVars>(
  {
    name: 'AskingFirstTodo',
    initVars: () => ({ ok: false }),
  },
  <>
    {() => <p>You have no todo now. Do you want to create one?</p>}

    <$.PROMPT<AskingFirstTodoVars>
      key="ask-adding"
      set={makeContainer({ deps: [useIntent] })(
        (getIntent) =>
          async (_, { event }) => {
            const intent = await getIntent(event);
            return {
              ok: intent.type === 'yes' || intent.type === 'add',
            };
          }
      )}
    />

    <$.IF<AskingFirstTodoVars> condition={({ vars: { ok } }) => !ok}>
      <$.THEN>
        {() => <p>Ok, tell me when you need.</p>}
        <$.RETURN />
      </$.THEN>
    </$.IF>

    <$.CALL key="adding-todo" script={AddingTodo} />
  </>
);
In the script we ask the user whether to create the first todo.
If yes, call the AddingTodo script to continue the creating process.
Remember to export the new script too:
export { default as AddingTodo } from './AddingTodo';
export { default as AskingFirstTodo } from './AskingFirstTodo';
Then we can use it in handleChat when a user doesn't have any todo:
import AskingFirstTodo from '../scenes/AskingFirstTodo';
// ...
    const profile = await profiler.getUserProfile(event.user);
    const { data } = await todoController.getTodos(event.channel);
    const hello = (
      <p>Hello{profile ? `, ${profile.name}` : ''}! I'm a Todo Bot 🤖</p>
    );

    if (data.todos.length === 0) {
      return reply(
        <>
          {hello}
          <AskingFirstTodo.Start />
        </>
      );
    }

    return reply(
      <WithMenu todoCount={data.todos.length}>{hello}</WithMenu>
    );
  }
);

export default handleChat;
Now the bot asks users to create the first todo like:
tip
Delete the todos data in .state_data.json file to try this feature.
Our bot can process a dialog according to the script now. Next, we'll learn how to use a webview to provide more features.